Blog — Articles — Jeff Goodwin Fishing

Smoke em if you got em!

King salmon, Kokanee salmon, or trout can be easily smoked and turned into a delicious treat!

King salmon, Kokanee salmon, or trout can be easily smoked and turned into a delicious treat!

Its the fall season in Shasta County and the bad weather is coming!  The leaves are turning, acorns are dropping, and the best fishing of the year is, for the most part, in the history books. We've had an exceptional year for fishing here in the north state and I'm sure a lot of you have some King salmon, Kokanee salmon, or even some big trout fillets in the freezer.  Maybe some of you even have some left over from last year.  Fresh fish is best for the dinner table, but if its last years fish or its a big fillet from a darker salmon you caught on the Sacramento River this year, smoking the fillets just may be your best option for turning your fillets onto a delicious treat.

Getting started!

Smoking fish is really easy as long as you have a smoker and a few basic ingredients.  The first step in smoking any fish is the brining.  Brining your fillets or cut pieces of fish is easily achieved using three basic things;

  • 1 cup non iodized salt
  • 1 cup brown sugar
  • 1 gallon of water 

These are basic ingredients for brining, but its what I always use as the ingredient base for brining before smoking.  There are a lot of brine recipes out there, but I find that I have a hard time telling the difference between my basic brine and one with 10 ingredients.  I've smoked lots of fish over the years and people who have had some to taste have favorable responses.  In fact, lots of clients and acquaintances ask for my recipe.  Sometimes I will add a little ground pepper, something a tad spicy, or even something to sweeten it up, but not until after I've completed the brining of the fish.

brining the fish.

I will add the salt and sugar into my brine bucket that is already filled with a gallon of water.  I stir in the salt and sugar until I believe it has dissolved.  Once the brine is ready, I fill the bucket with the cut pieces of fish.  I try to make the pieces of fish around the same size so it brines and smokes evenly.  For example, if you smoke a big chunk  and a small chunk of fish at the same time, the brine and smoke times will need to differ.  Keep them all similar in size and they will brine and smoke best at the same amounts of time.  I place the bucket of fish in my garage refrigerator over night.  The following morning, I will remove the fish pieces from the bucket making sure to rinse the brine off the fish before preparing to smoke.  I pat the pieces down with paper towels to absorb the rinse water and set them out on the smoke racks to get a bit tacky to the tough before I place them in the smoker.  When they have dried off a bit and are tacky to the touch, I will sometimes add some of the aforementioned spices, like pepper, to the meat sides of the pieces of fish.

Smoking your fish.

I will place the pieces of fish on the smoker rack skin side down.  This make turning, if desired, the pieces of fish over during smoking a bit easier and they tend to fall apart less when doing so.  Smoke time will depend on the type of smoker you have, and often time the outside temperature will play a role in smoke time as well.  I check on my fish often throughout the smoking process.  I think smoke time is critical and it will determine the quality of your smoked fish when its done. I would say I like the smoke time to be 4-6 hours.  If its done real quick it tends to end up like cooked fish, and if done too slowly may have an over powering smoke flavor when done.  I've tried most of the wood/chip varieties out there and I'm sold on apple wood for smoking fish.  Its got a subtle flavor that doesn't over power your fish.  One important thing to consider is where you locate your smoker.  It does create a bit of smoke in the air and if its near an open door or window in your house, it can leave a powerful smoke smell for days.

Finished product.

Placed on a tray and vacuum sealed this Kokanee salmon will last for a good year or two if you can wait that long to eat it.

Placed on a tray and vacuum sealed this Kokanee salmon will last for a good year or two if you can wait that long to eat it.

Once you have smoked your fish and its ready to eat, keep it refrigerated and it will keep for quite a long time if necessary.  If you want to freeze and store some for a longer period of time, place smaller batches on a styrofoam tray and vacuum seal it.  It will keep in the freezer for a year or more without freezer burn.  Smokers can be purchased just about anywhere, but I buy my smokers and smoking supplies at www.sportsmanswarehouse.com.  They have all you will need to get set up.  This is just a basic bit of fish smoking information for beginners.  There is a lot of detailed information and brine recipes online if you wish to expand on what I have already passed on.  Good luck and enjoy eating your deliciously smoked fish!

Share

Curing eggs for Sacramento River King salmon

The Sacramento River system in northern California has seen some pretty good King salmon fishing the last five years in spite of a relentless drought in the region that had plagued this watershed for nearly four consecutive years, beginning in 2013.  State and Federal hatcheries worked hard to raise juvenile King salmon for the annual spring releases which go primarily into the Sacramento, Feather, and American Rivers.  Hatcheries have seemingly reached their benchmarks for smolt rearing and release and the continued good returns are expected in the foreseeable future.

There are many techniques that are used to catch Sacramento River salmon, but dragging, hover, or back bouncing roe through holding water is certainly at the top of the list, especially in the upper reaches of the Sacramento River below the Coleman National Fish Hatchery near Anderson, Ca.  Coleman NFH releases twelve million fall run salmon smolt every spring which in most years, creates a spectacular fall salmon fishery in the deep swirling holes below Battle Creek which is basically the inlet to the hatchery.  The mouth of Battle Creek is located just above the infamous "Barge Hole" which, in some years, holds hundreds if not thousands of King salmon waiting for those October rains before pushing up Battle Creek and into the Coleman NFH ladder.

From August thru October every year its not uncommon to see 10-20 boats a day working the Barge Hole for King salmon and as many as 70 boats have been counted during the August 1st opener a few years back.  Anglers and guides alike hang (hover fish) 10-16 oz. cannon ball weights on a dropper in the deep water with 5-6' foot leaders which end with a 1/0 hook and a quarter size piece of cured roe.  The holes and flats above the Barge Hole are also frequently covered by back bouncing eggs and often times in the latter parts of the morning when the boats spread out or head down river, are worked over by boats that are dragging roe (boon doggin) from the mouth of Battle Creek down to the end of the Barge Hole.  All these egg fishing techniques have their standout days, but for any of these egg fishing techniques to produce consistently, your bait absolutely has to be dialed in.  These Kings are the most finicky biters I have ever fished for, and if your eggs lack anything but the best cure and bite stimulants, you're going to watch a lot of fish being caught in other boats.

Fortunately, the Pautzke Bait Company makes the task of producing a great cured egg that these Sacramento River Kings will consistently eat, quite easy.  Their product line offers all of the key ingredients, scents, and bite stimulants needed to cure up some of the best eggs to present to your target species on any body of water, including Sacramento River King salmon.  With everything you will need for a killer egg recipe already in the Pautzke product line, curing great eggs for finicky Sac River Kings has never been easier!  I've continued to find success using a specific recipe and its put fish in the box every single trip I've run this season.

Start with fresh skeins!

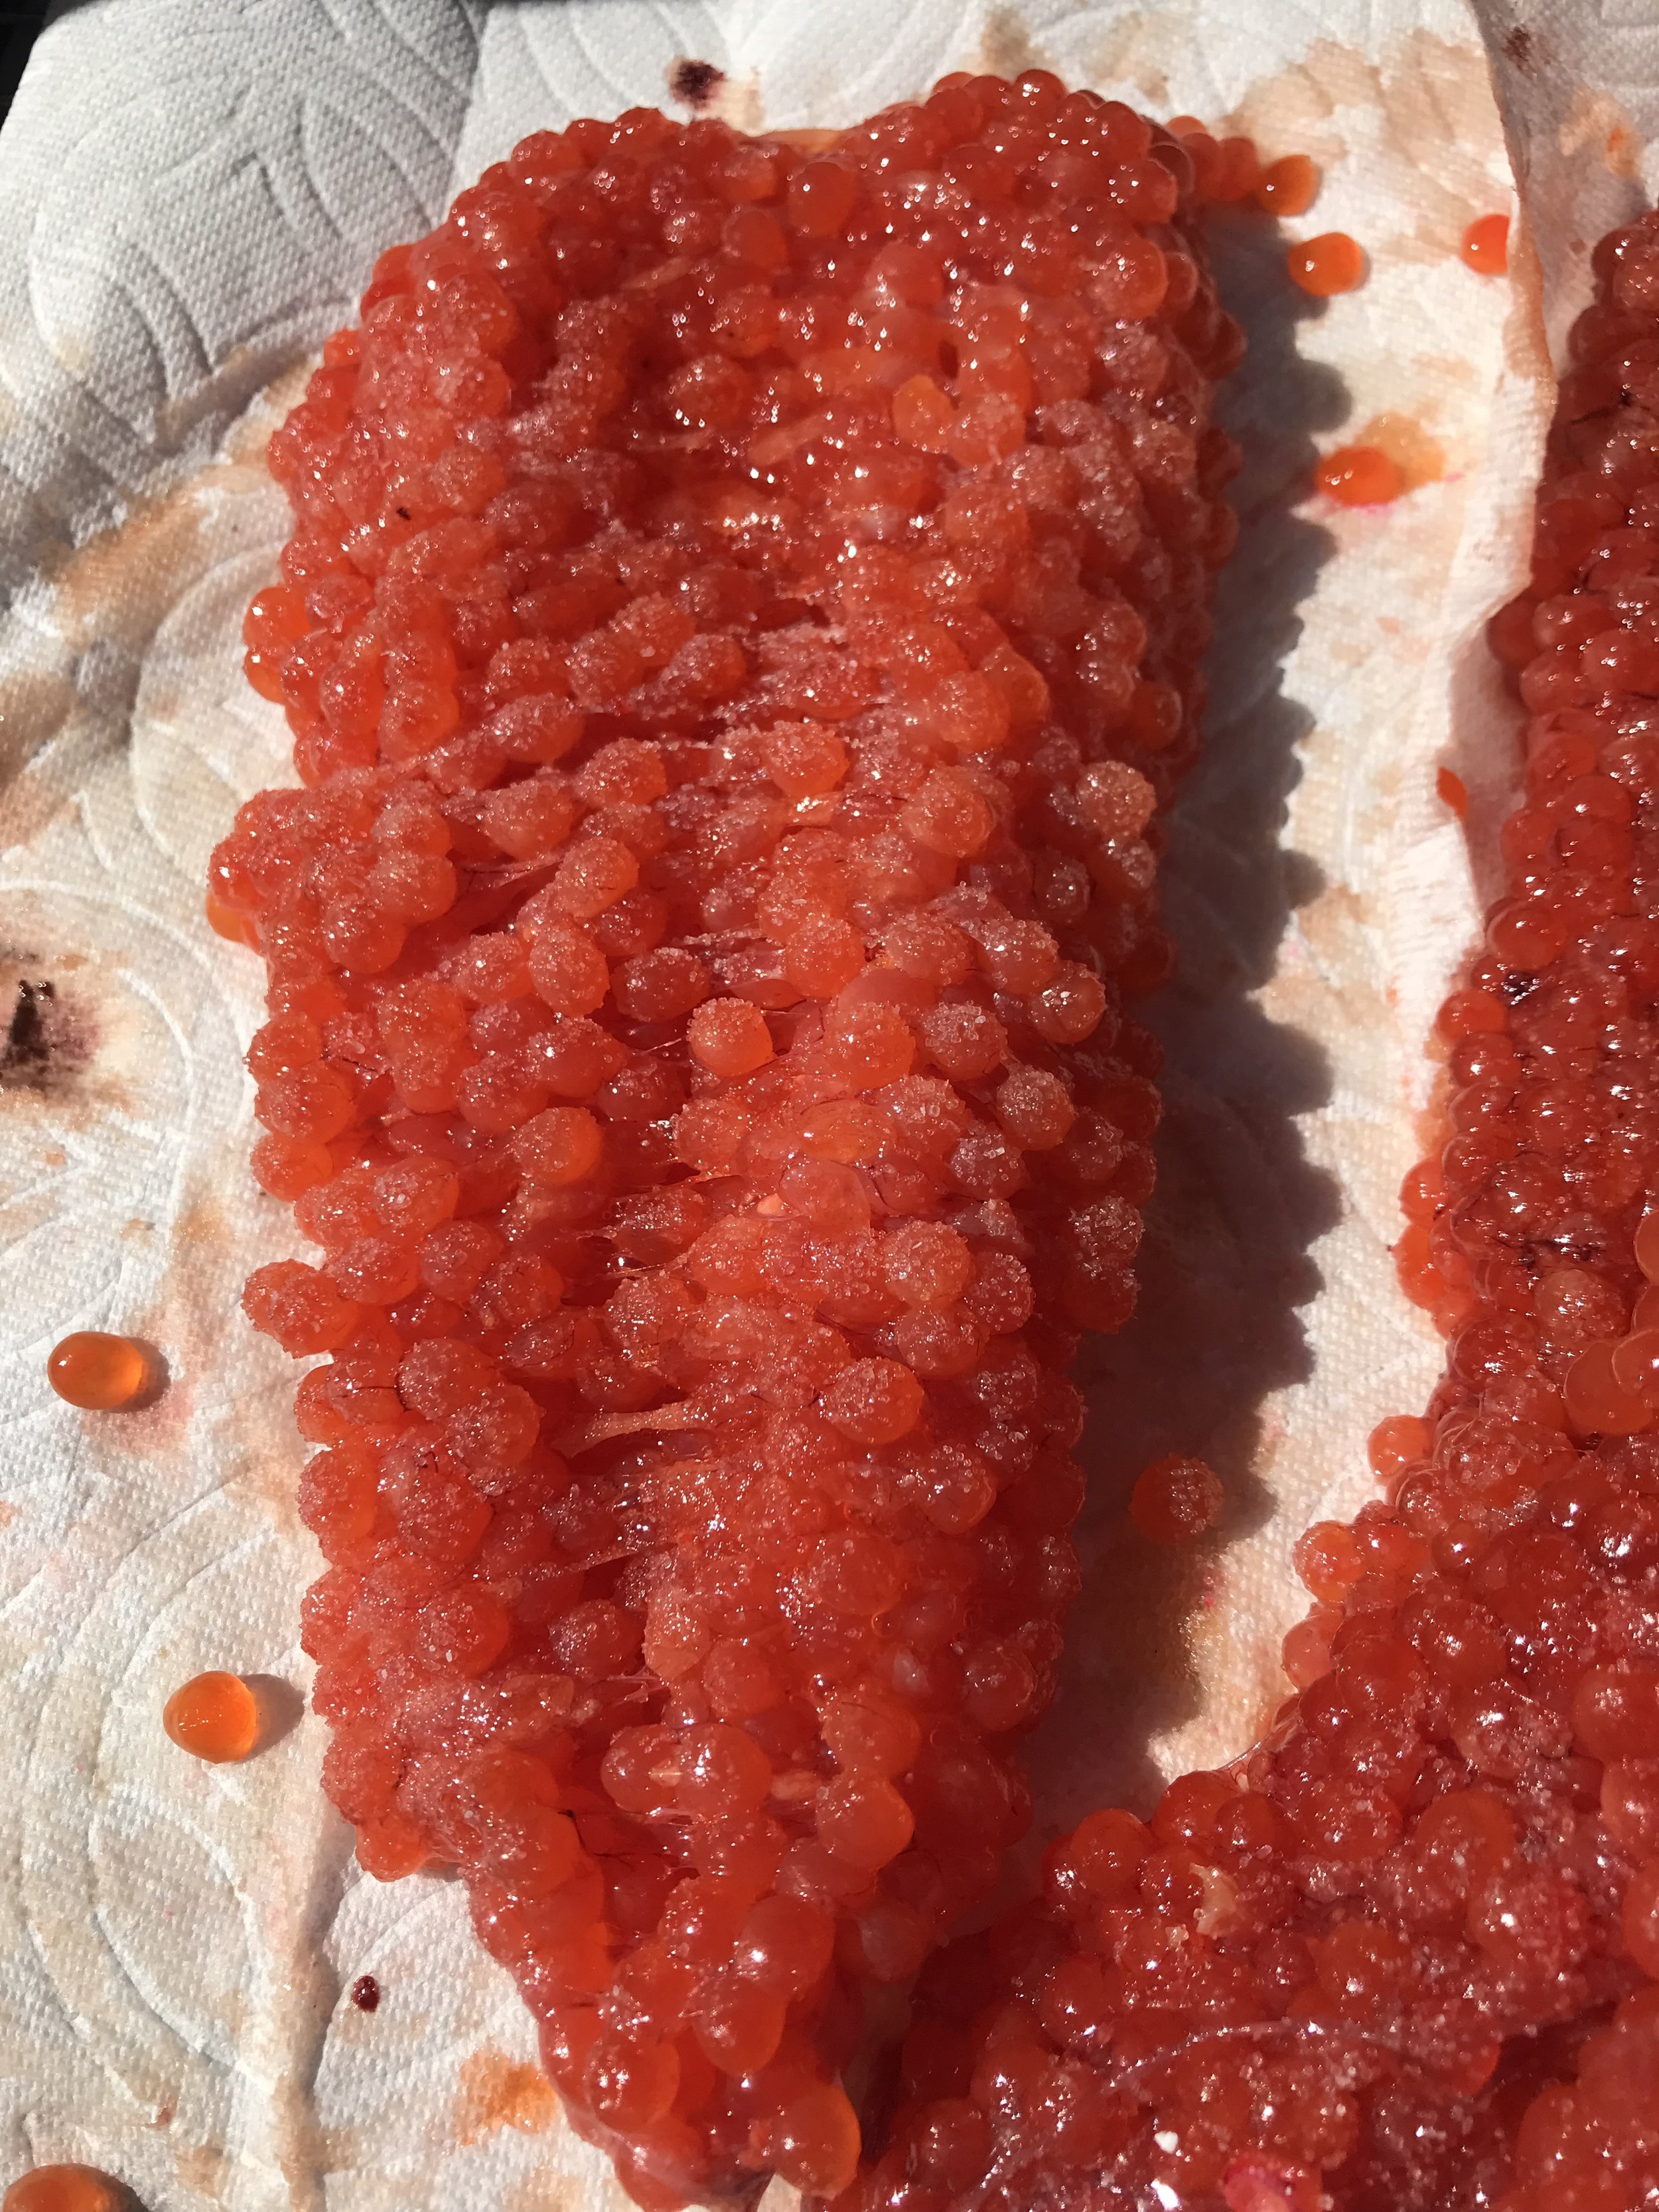
Fresh, blood free skeins is a great starting point!

Fresh, blood free skeins is a great starting point!

Preparing your skeins before curing starts with bleeding out your salmon after its landed.  This will help reduce the amount of blood that will be left in the Skeins when you harvest them from the salmon.  I, like most, will take the skeins directly from the salmon before I cut the fillets and place them directly into a Zip Loc baggie and into the bait cooler.  Its stupid hot in August and September in the Sacramento River valley so getting your skeins in a cool place will keep them from really warming up.  When I get home after a day on the river, I will remove any blood that is left in the skeins and put them in the fridge.  Its not critical in my mind to cure them right away, but it should be done within a few days for sure.

First steps for curing.

Butterfly your skeins with a dull knife or scissors and lay them berry side up!

Butterfly your skeins with a dull knife or scissors and lay them berry side up!

I butterfly several skeins and lay them side by side, egg side up.  This allows me to cure several skeins at a time and makes my job easier.  The first ingredient I add is non iodized or kosher salt to the open face of the berries.  Not a lot, but just enough to lightly dust the skein.  The Sacramento River Kings I fish for are 260 miles up river and slightly bumping up the salt content in my cure has proven to be effective.  I will normally hold off on adding Pautzke Fire Power krill because the Pautzke Fire Cure I use already contains it.  Some batches I put up will receive a dusting of Fire Power krill after I add salt to my skein, but I usually apply more Fire Power when I'm ready to fish them.

Its time for the main curing ingredients.

This is the first layer of Pautzke Fire cure before I flip the skeins and dust the back side of the skeins as well.

This is the first layer of Pautzke Fire cure before I flip the skeins and dust the back side of the skeins as well.

I will now apply a light layer of Pautzke Fire Cure on all the skeins and then will flip them over and apply another light layer of Fire Cure on the membrane side as well.  Once this has been accomplished on all of the skeins I have laid out, I will lightly work with my fingers the Fire Cure into the berry side of the skeins.  I will then pick the skeins up individually and place them in a gallon Zip Loc bag and set them aside. 

Adding the last ingredient.

Pautzke Nector is an essential ingredient in my salmon cure.

Pautzke Nector is an essential ingredient in my salmon cure.

After all of my skeins have gone through the aforementioned curing process and are sitting on my work surface, I add the final ingredient to my skeins.  I use a generous 1 second squirt of Pautzke (red) Nector into my plastic baggie containing whats usually about 4 salmon skeins depending on size.  As the curing process begins and goes through its stages of completion, the Pautzke Nector will be pulled back into the eggs giving them the final dose of stimulants needed to create a premier egg that will consistently catch King salmon on the Sacramento Rivers upper reaches.

Curing time is important.

I prefer to allow the curing process to occur in a plastic baggie in a cool place.  For me, its the refrigerator.

I prefer to allow the curing process to occur in a plastic baggie in a cool place.  For me, its the refrigerator.

Curing time on the Sacramento River is very important.  Even though the Pautzke Bait products will have these eggs cured in a few days, I like to give them more time.  Its standard for me to let my eggs cure for 5 days before I prepare them for freezer storage.  I put the cure date on my baggies and always know I let them cure for 5 days before freezing them.  There are many different ways to store and freeze cured eggs.  I prefer to put two large skeins in a baggie, freeze them after 5 days and then vacuum seal the whole bag containing the eggs.  I can get 3 years of freezer storage if necessary using this freezing method.

Preparing to fish them.

Once the Sacramento River Kings bite these eggs, they won't let go!

Once the Sacramento River Kings bite these eggs, they won't let go!

Since most of my Pautzke eggs are stored frozen to be used the following season, there is a process I use to prepare them for my fishing trips.  I will thaw my frozen eggs slowly before removing them from the vacuum sealed baggies.  I will open the thawed eggs and drain off the excess juice from the plastic bag and will remove the individual skeins from the baggie.  I drift fish most of the time so I need a firmer egg so they will stay on the hook.  To achieve the firmness I desire, I will set out the skeins on paper towels and let them get a little tacky before dusting them with borax.  Once they are firming up nicely after the borax application, I will wrap each skein in a an unscented paper towel, put them in a plastic baggie and refrigerate..  I will continue monitor the progress of the eggs and when its time to fish them, in the water they go!

Share

How to make the best drift fishing weights!

I do a lot of drift fishing on the Sacramento river for salmon, trout, and steelhead.  In fact, its by far my favorite way to fish from my boat, when either side drifting or boondoggling through holding water.  I've spent countless hours on the water over the years drift fishing, and I've tried every weight system out there looking for the most efficient weight that is quick and easy to make and hangs up less than the others I've tried over the years.  Success on the water depends highly on keeping your baits in the strike zone and in front of holding fish.  Hang ups, and subsequent break offs will significantly reduce your chances of hooking fish when drift fishing.  The less we all hang up, the less lines and lead we'll leave on the bottom to create even more drift hazards in our favorite stretches of water.  The following drift weight system is by far my all time favorite and I know its helping me catch more fish by hanging up less.

The components;

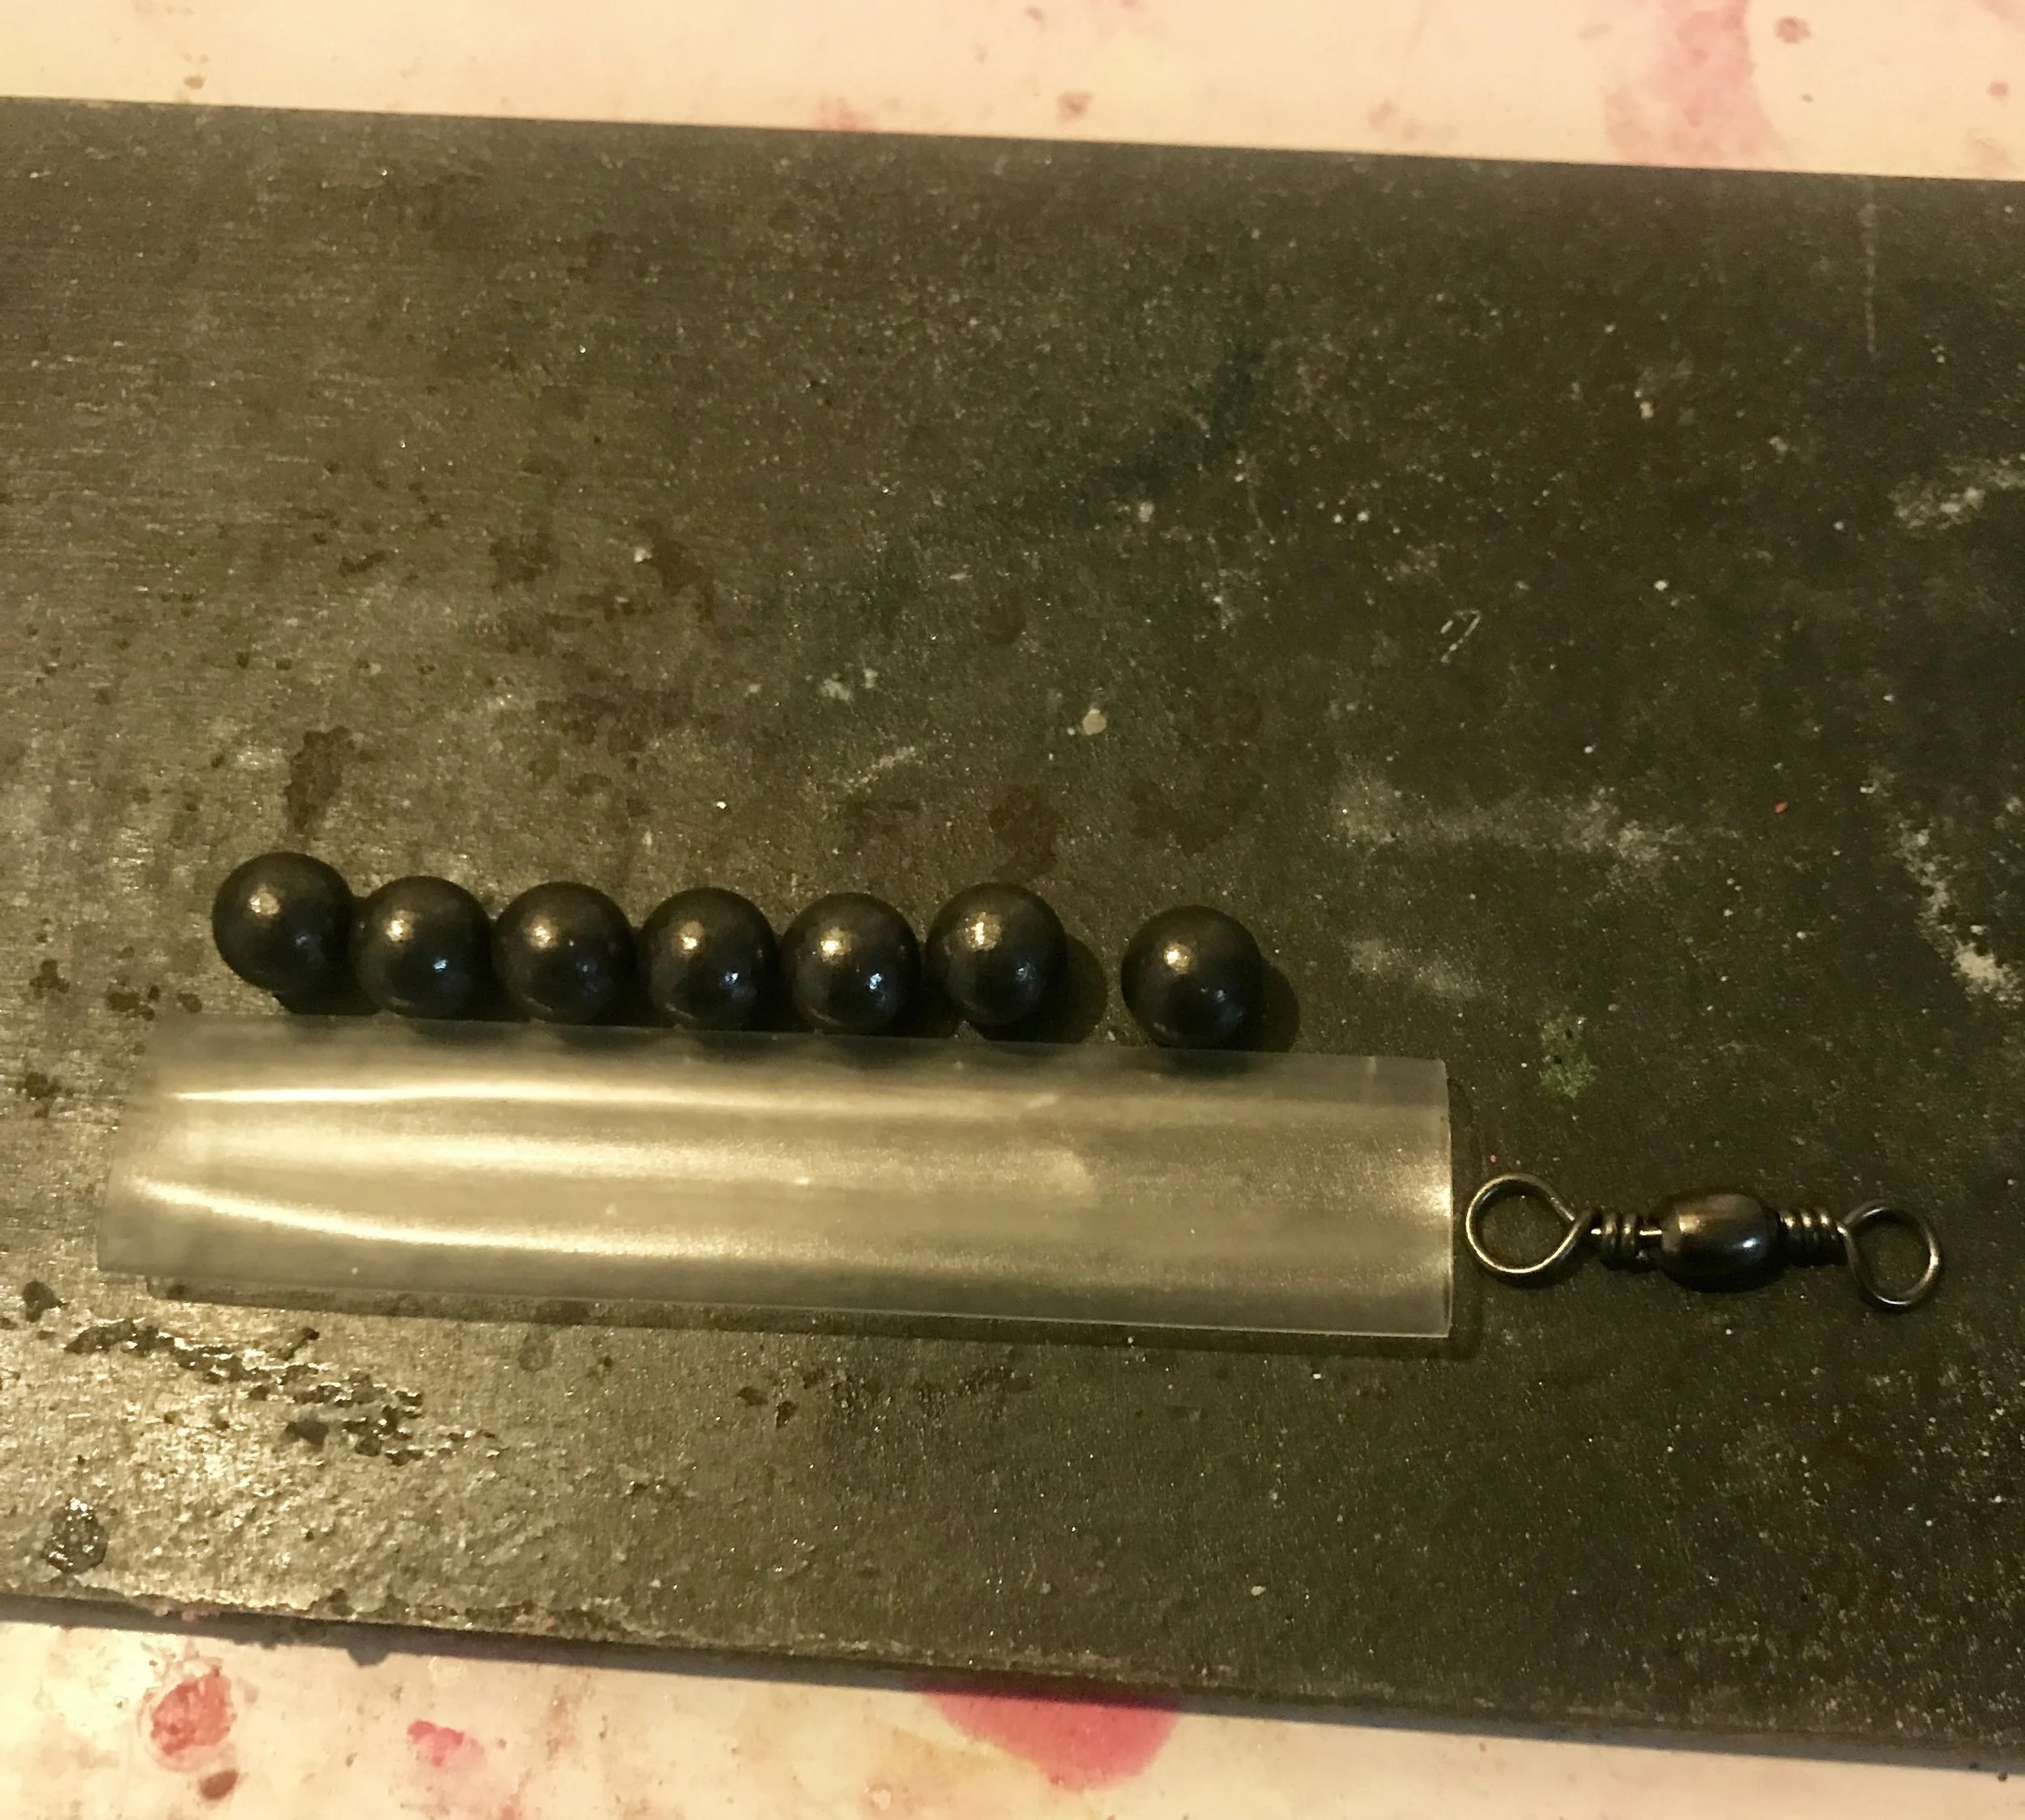
.330 lead shot, #5 barrel swivels, heat shrink tubing, and a heat gun.

.330 lead shot, #5 barrel swivels, heat shrink tubing, and a heat gun.

Ordering all the components for these weight systems is quick and easy.  First, I get my heat shrink tubing at www.buyheatshrink.com.  They have a huge of variety sizes and material and you can buy from 25'-250'.  I get my .240 and .330 lead shout from www.riverguidesupply.com and you can buy the shot in 5-10 lb bags.  As for the #5 barrel swivels, I get the cheapest I can find from eBay and they work great for this application.  The last item you may or may not need is a small heat gun for the spring wrap.

Prepping your weights;

Three components make up these drift weights.

Three components make up these drift weights.

I use .330 size lead shot for my salmon fishing and use .240 shot for my trout and steelhead fishing.  I use the appropriate diameter heat shrink tubing for my two different size lead shot.  The  heat shrink is cut to the appropriate length for the size of weight I plan to make.  In the picture above you can see that I cut the heat shrink to a size a bit longer than the number of shot I plan to use.  This allows for shrinking and I can cut a number of pieces of heat shrink to speed up the process of making them.  

Making your drift weights;

Heat one end of the heat shrink tube before you load your lead shot!

Heat one end of the heat shrink tube before you load your lead shot!

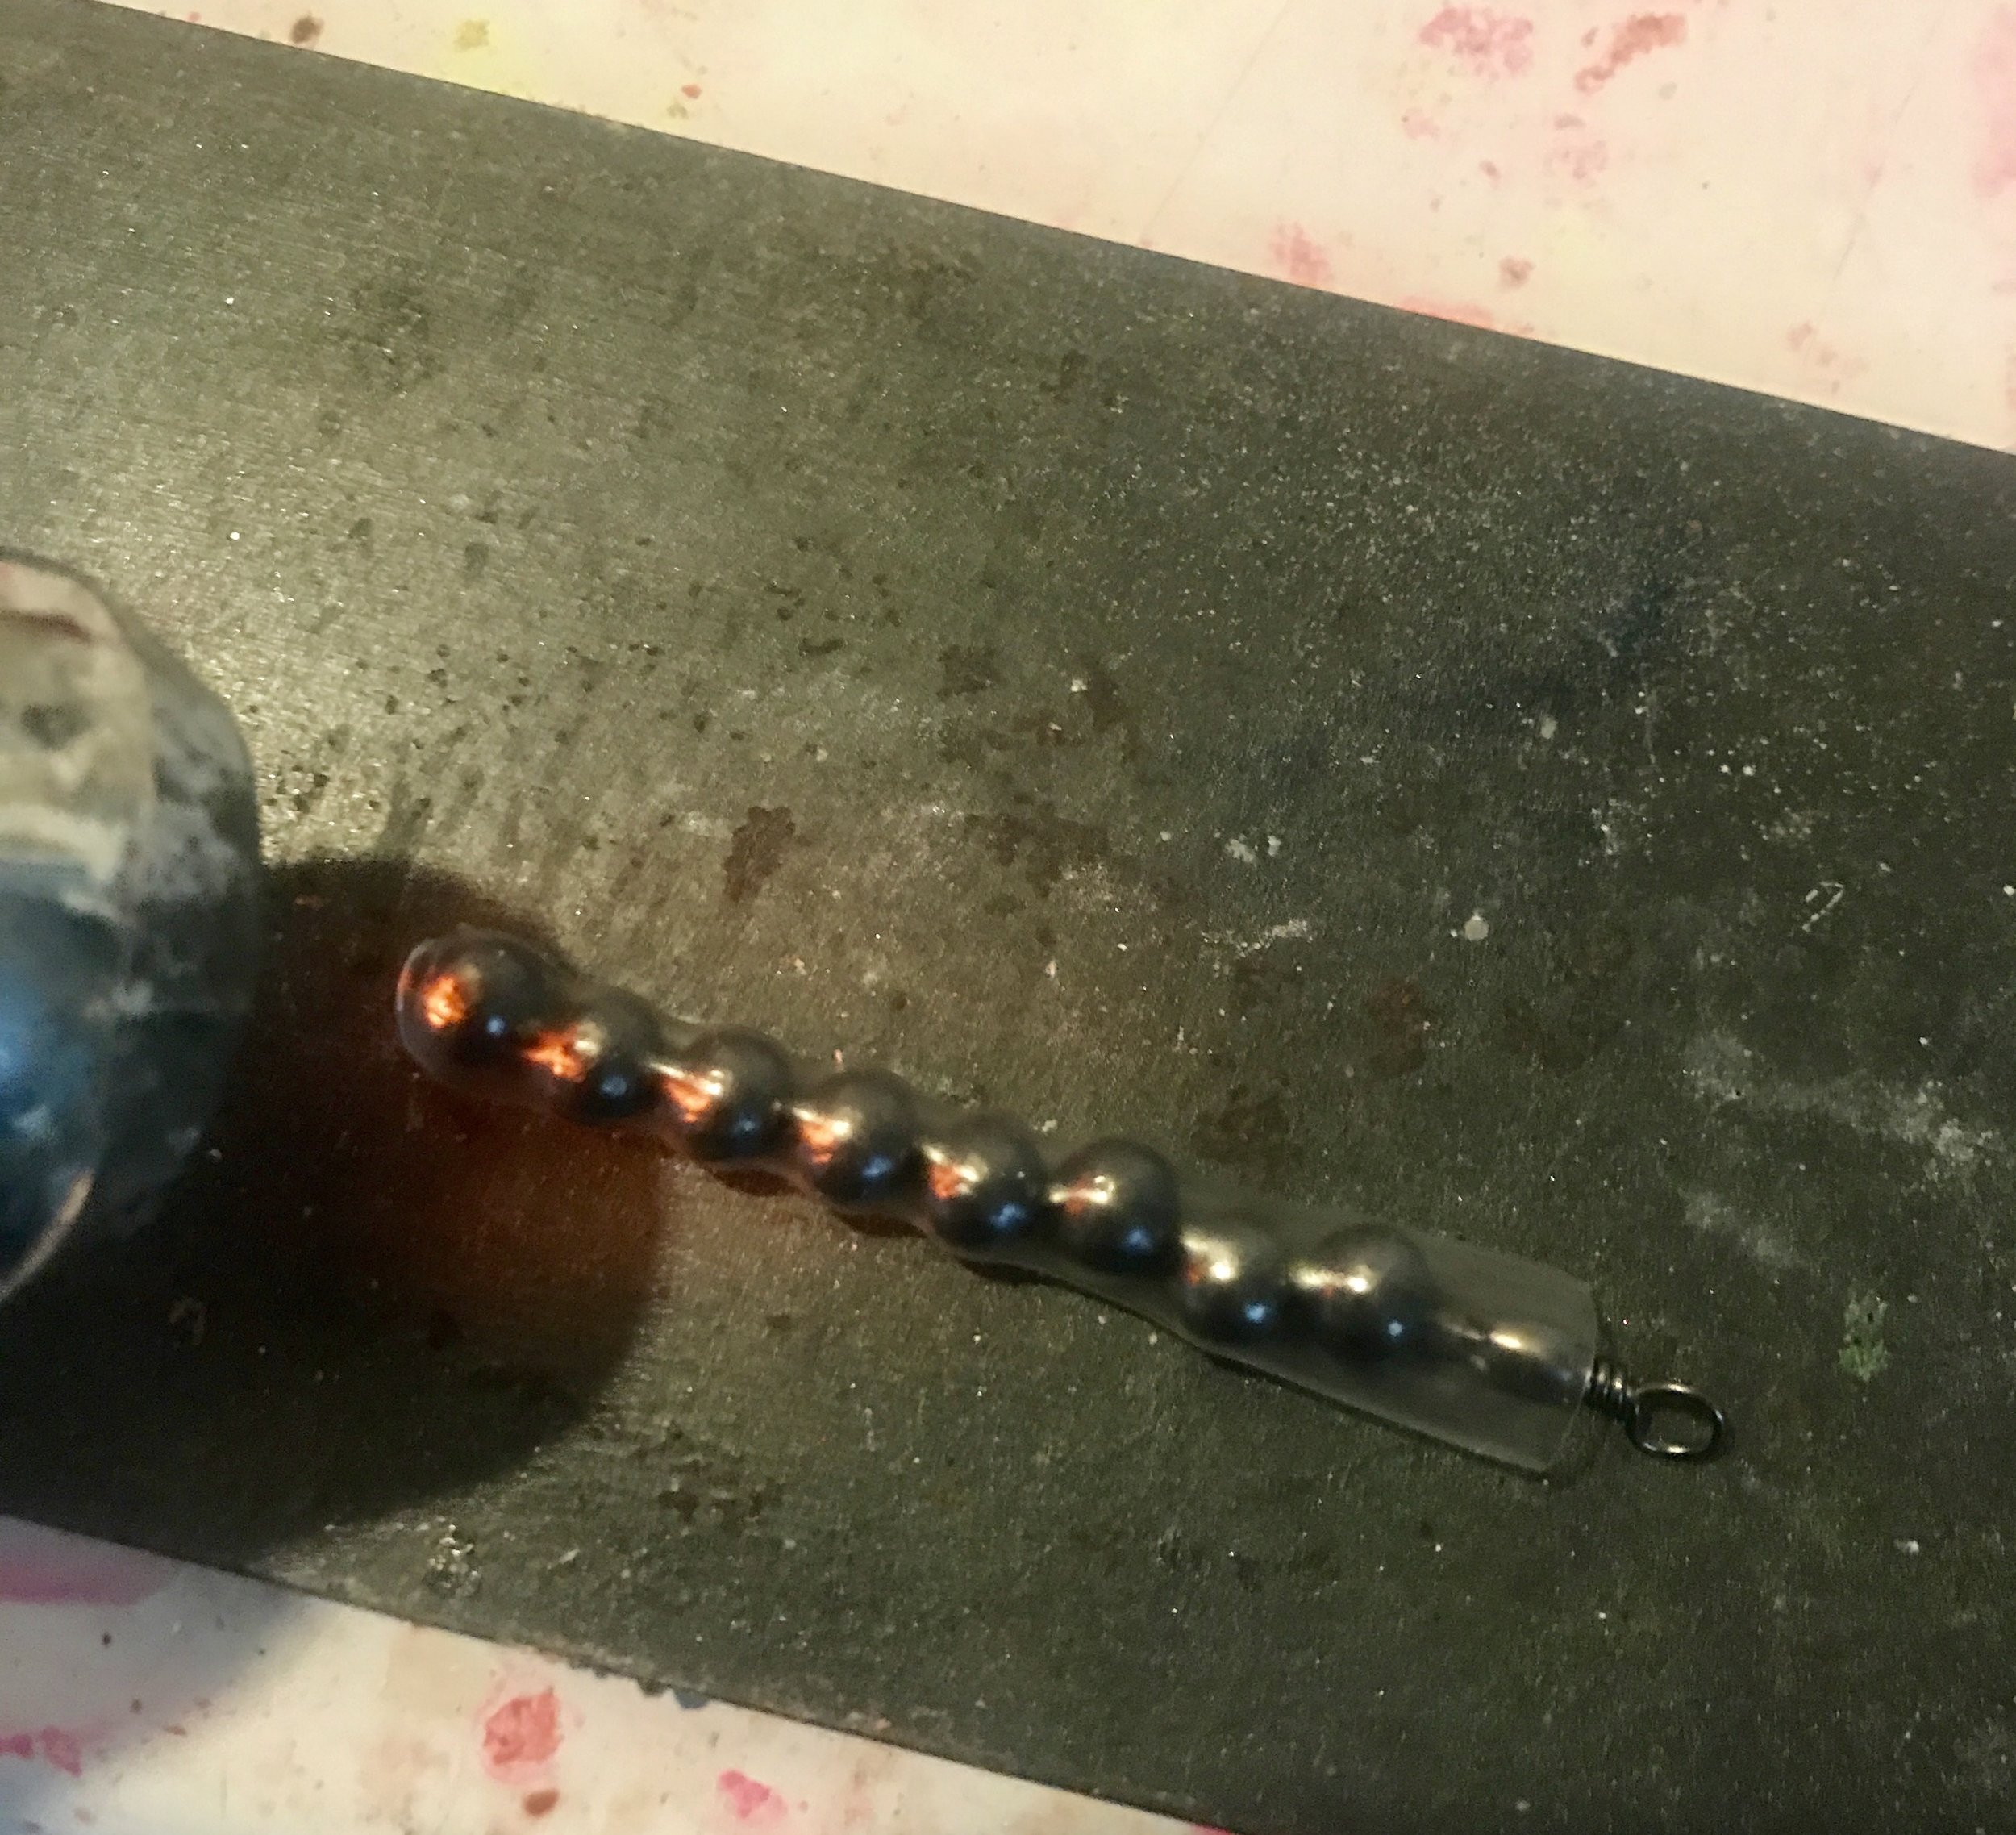
The first thing I do is to run one of the open ends of the heat shrink tubing over the heat gun to shrink one end of your cut piece.  This allows you to drop your lead shot into the tubing without any of them falling out.  Once you have filled the appropriately sized piece of heat shrink, simply add a #5 barrel swivel so that it rests under the last piece of lead shot.  Note the piece of 1/4" steel plate under the drift weight.  I use this under my weight to heat my shrink tubing so it doesn't burn or heat the average surface of areas where we usually do this sort of thing.

Finishing your drift weight assembly;

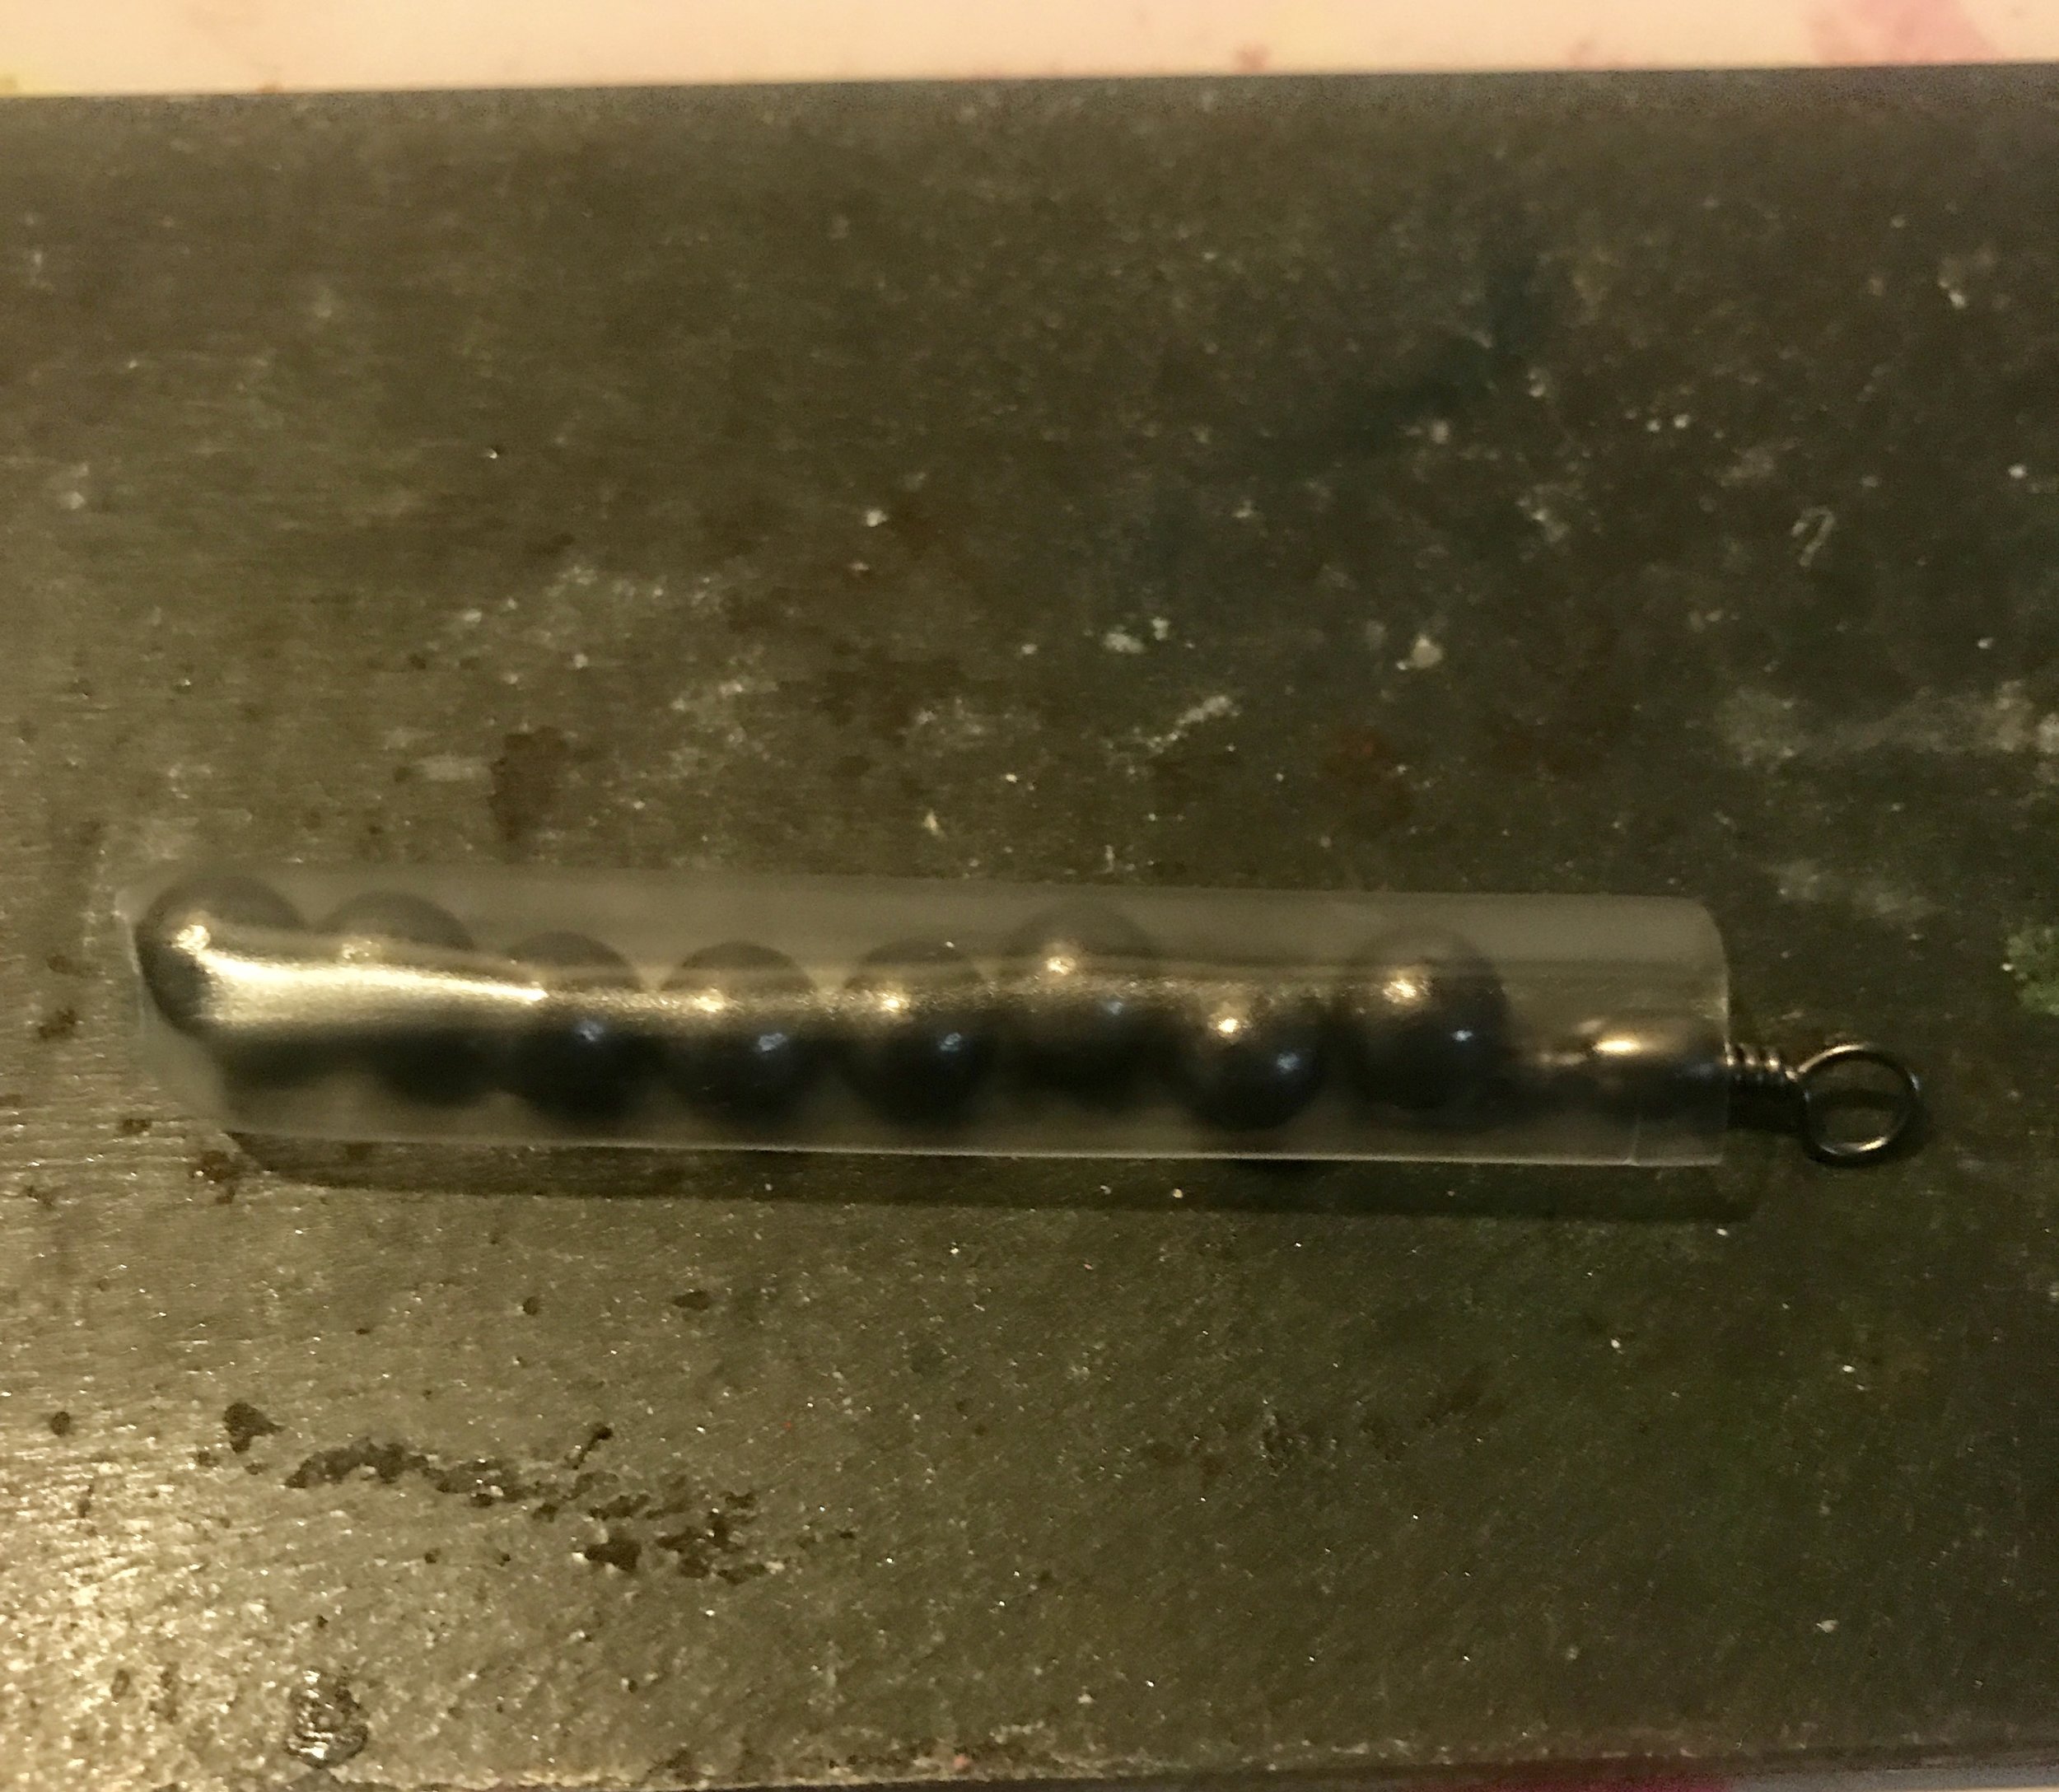
Use a heat gun to shrink the heat shrink tubing around your lead shot and swivel.

Use a heat gun to shrink the heat shrink tubing around your lead shot and swivel.

I fire up my heat gun and heat both sides of the heat shrink around the lead shot and swivel.  It just takes a second to do both sides.  Once its completed, I set them aside individually to cool off for a few minutes.  Don't stack on top of each other until they cool off or the heat shrink tubing will stick together.  Its quick and easy!

The final product;

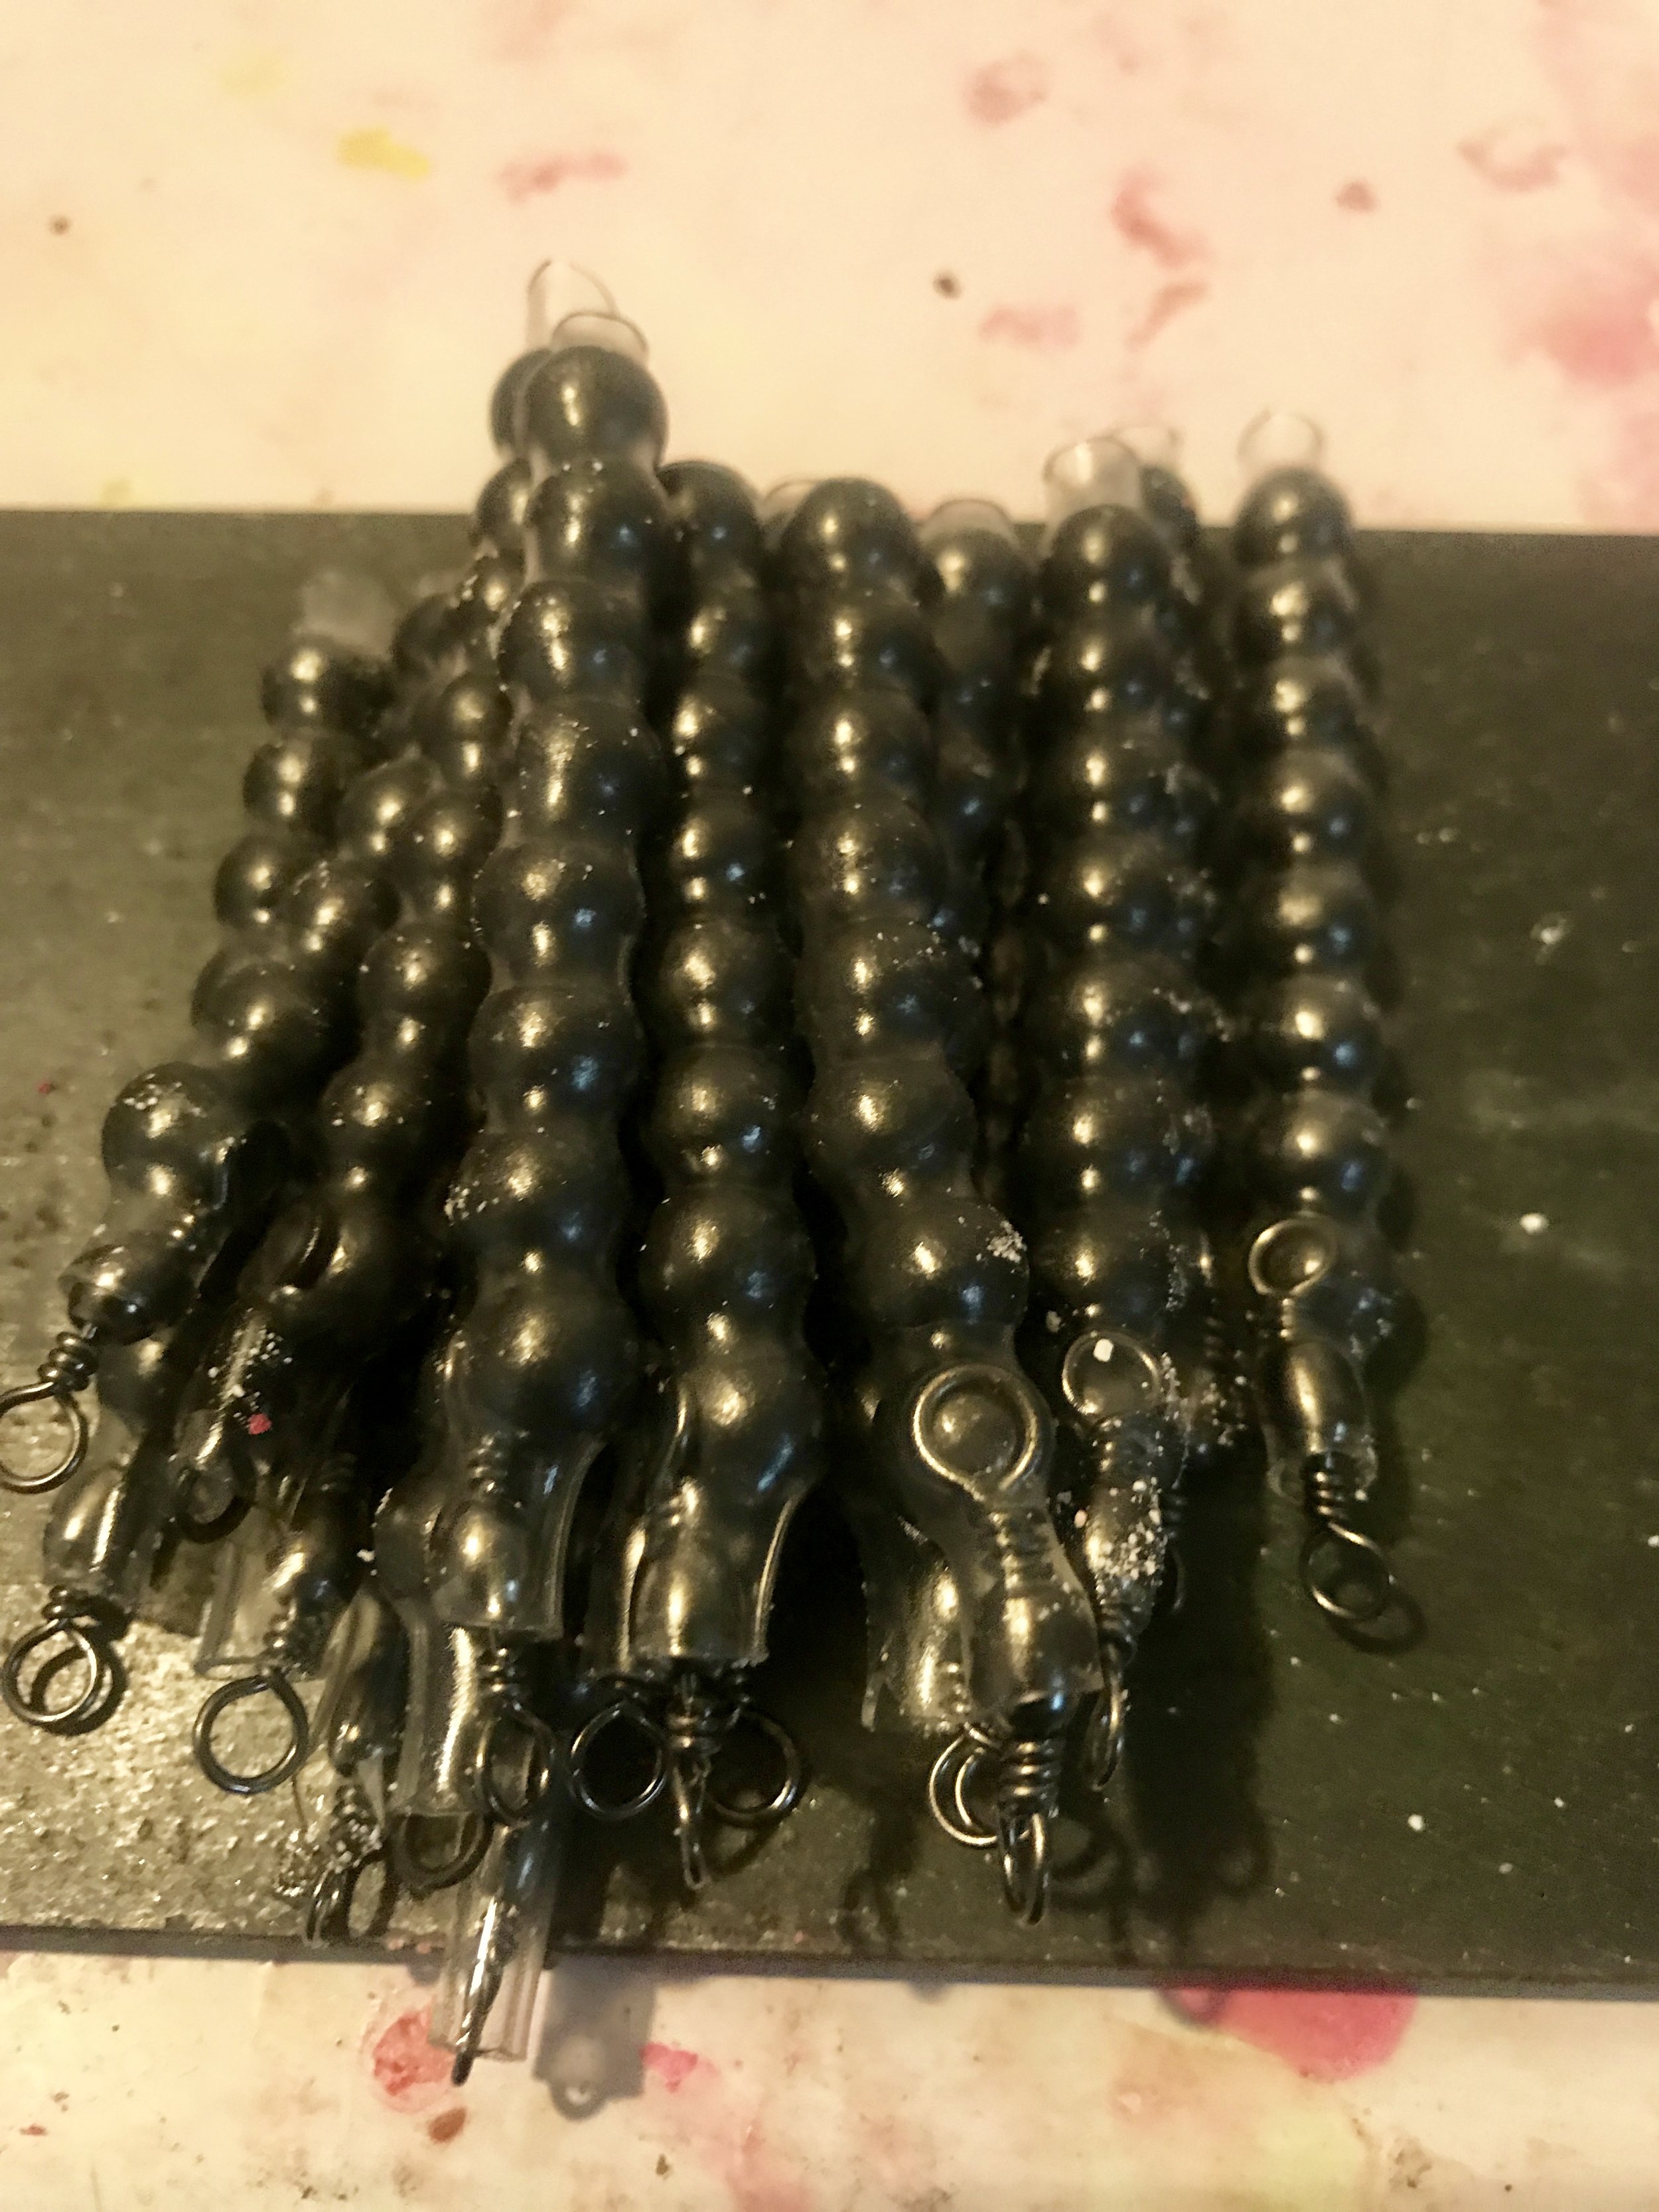
Make as many as you need and use different size shot and numbers of shot to satisfy your drift fishing requirements for the areas of the rivers you fish.

Make as many as you need and use different size shot and numbers of shot to satisfy your drift fishing requirements for the areas of the rivers you fish.

Now that you know how to make these great drift weights, I'll explain some of the advantages to their use.  I find that they are easier to make than slinky material weights and they are easy to attach a snap swivel to.  A little more labor intensive than pencil lead, but they hang up way less and you don't have to cut and punch holes in the pencil lead, sometimes guessing how much length you will need for the area you are fishing.  

The heat shrink is slippery in the rocks and doesn't grab like parachute chord or raw pencil lead.  The hang ups are far fewer and time in the strike zone is extended.  I can also easily organize my weights by the number of lead shot in each piece.  It also helps me to communicate to my clients which weights to attach to their lines for a specific drift on my home river.  As flows often reduce with water releases as they do on the Sacramento River where I fish, I can simply cut off a shot to adjust how the weight is fishing if its a tad too heavy.  Its a great drift weight system and if you use them I think you'll agree.  Good luck and I hope this guide proven drift fishing tip helps you put more fish in the fish box for many years to come!


Share